怎样用beego开发服务端应用?
目录
- 目录
- 说明
- Quick Start
- 开发文档
- 目录结构说明
- 使用配置文件
- beego默认参数
- 日志处理
- 路由设置
- 需要特别注意的NSAfter()
- 自动生成
- 生成文档
- 连接数据库
- 数据库迁移(migration)
- beego.Controller处理http请求
- 测试用例
- 参考
说明
beego是国内团队开源的golang开发框架,是一个关注度和使用量都比价高的项目。
Quick Start
beego快速入门中给出一个很简单的例子。
建议先阅读bee工具的使用。
安装
首先需要安装beego和bee工具:
$ go get -u github.com/astaxie/beego
$ go get -u github.com/beego/bee
为了能够直接使用bee命令,需要将$GOPATH/bin添加到$PATH变量中。
创建应用
创建一个名为hello的应用,可以选择web应用,或者api应用:
$ bee new hello     //创建一个web应用
$ bee api hello     //创建一个api应用
执行结束后,会在当前目录下创建名为hello的目录:
.
|____hello
| |____conf
| | |____app.conf
| |____controllers
| | |____default.go
| |____main.go
| |____models
| |____routers
| | |____router.go
| |____static
| | |____css
| | |____img
| | |____js
| | | |____reload.min.js
| |____tests
| | |____default_test.go
| |____views
| | |____index.tpl
编译运行
进入hello目录中,执行bee run,就会完成编译、运行:
$ cd hello/
$ bee run
______
| ___ \
| |_/ /  ___   ___
| ___ \ / _ \ / _ \
| |_/ /|  __/|  __/
\____/  \___| \___| v1.9.1
2017/10/23 14:33:05 INFO     ▶ 0001 Using 'hello' as 'appname'
2017/10/23 14:33:05 INFO     ▶ 0002 Initializing watcher...
2017/10/23 14:33:06 SUCCESS  ▶ 0003 Built Successfully!
2017/10/23 14:33:06 INFO     ▶ 0004 Restarting 'hello'...
2017/10/23 14:33:06 SUCCESS  ▶ 0005 './hello' is running...
2017/10/23 14:33:06 [I] [asm_amd64.s:2197] http server Running on http://:8080
打包发布
项目打包发布:
$ bee pack
代码生成
生成models:
bee generate model user -fields="name:string,age:int"
生成controller:
bee generate controller user
生成view:
bee generate view user
生成文档:
bee generate docs
开发文档
beego开发文档中对beego做了很详细的说明。
目录结构说明
.
|____hello
| |____conf           <- 配置文件
| | |____app.conf
| |____controllers    <- 控制器,即http请求的handler
| | |____default.go
| |____main.go        <- main函数
| |____models
| |____routers        <- 路由,将url关联到controllers
| | |____router.go
| |____static         <- 静态文件
| | |____css
| | |____img
| | |____js
| | | |____reload.min.js
| |____tests          <- 测试
| | |____default_test.go
| |____views          <- 页面模版,controller中可以直接渲染对应的tpl文件
| | |____index.tpl
使用配置文件
beego参数配置中讲解如何使用配置文件、如何配置参数。
beego默认解析应用目录下的conf/app.conf文件,配置项可以通过beego.AppConfig.*读取:
beego.AppConfig.String("mysqluser")
beego.Appconfig包含多个方法:
Set(key, val string) error
String(key string) string
Strings(key string) []string
Int(key string) (int, error)
Int64(key string) (int64, error)
Bool(key string) (bool, error)
Float(key string) (float64, error)
DefaultString(key string, defaultVal string) string
DefaultStrings(key string, defaultVal []string)
DefaultInt(key string, defaultVal int) int
DefaultInt64(key string, defaultVal int64) int64
DefaultBool(key string, defaultVal bool) bool
DefaultFloat(key string, defaultVal float64) float64
DIY(key string) (interface{}, error)
GetSection(section string) (map[string]string, error)
SaveConfigFile(filename string) error
配置文件中可以配置section,通过runmode指定要使用的section,例如:
appname = beepkg
httpaddr = "127.0.0.1"
httpport = 9090
runmode ="dev"
autorender = false
recoverpanic = false
viewspath = "myview"

[dev]
httpport = 8080
[prod]
httpport = 8088
[test]
httpport = 8888
对于section的配置项,通过下面的方式读取,模式::配置参数名:
beego.AppConfig.String(“dev::mysqluser”)
配置文件中可以使用环境变量:
runmode  = "${ProRunMode||dev}"
httpport = "${ProPort||9090}"
加载特定的配置文件,可以加载多个配置文件,key不能冲突:
beego.LoadAppConfig("ini", "conf/app2.conf")
beego.LoadAppConfig("ini", "conf/app3.conf")
beego默认参数
beego的默认参数全部保存在beego.BConfig中。,可以访问、修改所有的配置信息。
在配置文件中设置的同名的key(不区分大小写)的值会覆盖默认值,例如:
appname = hello
httpport = 8080
runmode = dev

[dev]
AutoRender=false    #会覆盖beego.BConfig.WebConfig.AutoRender的默认值

[test]

[prod]
App配置:
beego.BConfig.AppName = "beego"
beego.BConfig.RunMode = "dev"
beego.BConfig.RouterCaseSensitive = true
beego.BConfig.ServerName = "beego"
beego.BConfig.RecoverPanic = true
beego.BConfig.EnableGzip = false
beego.BConfig.MaxMemory = 1 << 26
beego.BConfig.EnableErrorsShow = true
beego.BConfig.EnableErrorsRender = true
Web配置:
beego.BConfig.WebConfig.AutoRender = true
beego.BConfig.WebConfig.EnableDocs = true
beego.BConfig.WebConfig.FlashName = "BEEGO_FLASH"
beego.BConfig.WebConfig.FlashSeperator = "BEEGOFLASH"
beego.BConfig.WebConfig.DirectoryIndex = false
beego.BConfig.StaticDir = static
beego.BConfig.WebConfig.StaticExtensionsToGzip = []string{".css", ".js"}
beego.BConfig.WebConfig.TemplateLeft="
beego.BConfig.WebConfig.TemplateRight="
beego.BConfig.WebConfig.ViewsPath="views"
beego.BConfig.WebConfig.EnableXSRF = false
beego.BConfig.WebConfig.XSRFKEY = "beegoxsrf"
beego.BConfig.WebConfig.XSRFExpire = 0
监听配置:
beego.BConfig.Listen.Graceful=false
beego.BConfig.Listen.ServerTimeOut=0
beego.BConfig.Listen.ListenTCP4 = "tcp4"
beego.BConfig.Listen.EnableHTTP = true
beego.BConfig.Listen.HTTPAddr = ""
beego.BConfig.Listen.HTTPPort = 8080
beego.BConfig.Listen.EnableHTTPS = false
beego.BConfig.Listen.HTTPSAddr = ""
beego.BConfig.Listen.HTTPSPort = 10443
beego.BConfig.Listen.HTTPSCertFile = "conf/ssl.crt"
beego.BConfig.Listen.HTTPSKeyFile = "conf/ssl.key"
beego.BConfig.Listen.EnableAdmin = false
beego.BConfig.Listen.AdminAddr = "localhost"
beego.BConfig.Listen.AdminPort = 8088
beego.BConfig.Listen.EnableFcgi = false
beego.BConfig.Listen.EnableStdIo = false
Session配置:
beego.BConfig.WebConfig.Session.SessionOn = false
beego.BConfig.WebConfig.Session.SessionProvider = ""
beego.BConfig.WebConfig.Session.SessionName = "beegosessionID"
beego.BConfig.WebConfig.Session.SessionGCMaxLifetime = 3600
beego.BConfig.WebConfig.SessionProviderConfig
beego.BConfig.WebConfig.Session.SessionCookieLifeTime = 3600
beego.BConfig.WebConfig.Session.SessionAutoSetCookie = true
beego.BConfig.WebConfig.Session.SessionDomain = ""
Log配置:
beego.BConfig.Log.AccessLogs = false
beego.BConfig.Log.FileLineNum = true
beego.BConfig.Log.Outputs = map[string]string{"console": ""}
日志处理
学习一个框架,应当首先学习它的日志,了解它是如何管理日志的,合理使用日志,可以节省非常多的时间。
一般可以直接使用下面的方式,输出不同级别的日志:
beego.Emergency("this is emergency")
beego.Alert("this is alert")
beego.Critical("this is critical")
beego.Error("this is error")
beego.Warning("this is warning")
beego.Notice("this is notice")
beego.Informational("this is informational")
beego.Debug("this is debug")
可以设置为输出到文件中:
beego.SetLogger("file", `{"filename":"logs/test.log"}`)
如果不想输出到console:
beego.BeeLogger.DelLogger("console")
设置日志显示的级别:
beego.SetLevel(beego.LevelInformational)

可以选择下面的级别:
LevelEmergency
LevelAlert
LevelCritical
LevelError
LevelWarning
LevelNotice
LevelInformational
LevelDebug
输出文件名和行号:
beego.SetLogFuncCall(true)
路由设置
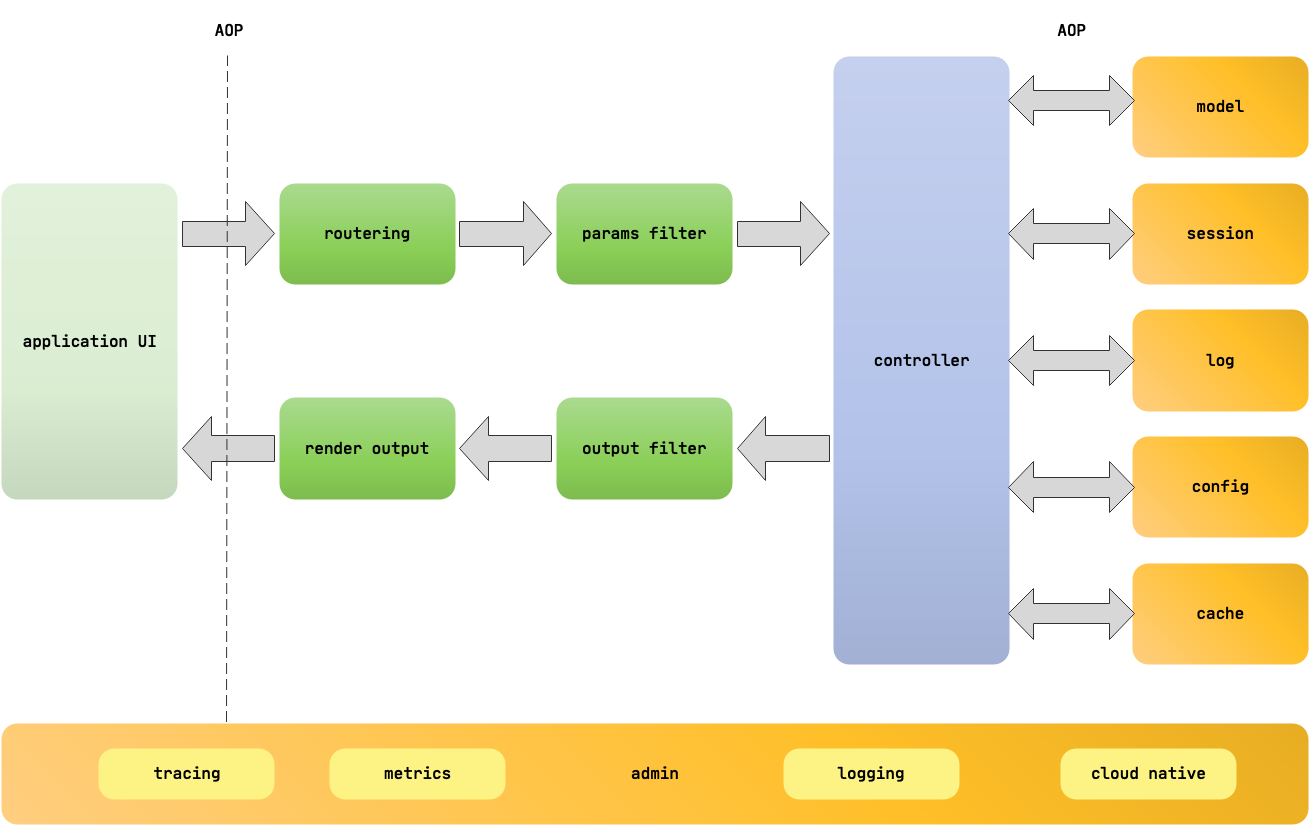
beego支持三种路由: 基础路由、正则路由、自动路由。
路由的表述方式
支持用正则的方式书写路由,参考了sinatra的路由实现。
 路由规则                           可以匹配
/api/?:id                ---->  /api/, /api/123 id=123
/api/:id                 ---->  /api/123  id=123
/api/:id([0-9]+)         ---->  /api/123  id=123
/user/:username([\w]+)   ---->  /user/abc username=abc
/download/*.*            ---->  /download/file/api.xml  path=file/api ext=xml
/download/ceshi/*        ---->  /download/cechis/file/api.json  splat=file/api.json
/:id:int                 ---->  等同于/:id([0-9]+)
/:hi:string              ---->  等同于/:hi([\w]+)
/cms_:id([0-9]+).html    ---->  /cms_123.html  id=123
可以通过*context.Context的Input.Param()方法读取路由中的变量:
ctx.Input.Param(":id")
在Controller中,通过下面的方式获取路由中的变量,this是controller:
this.Ctx.Input.Param(":id")
this.Ctx.Input.Param(":username")
this.Ctx.Input.Param(":splat")
this.Ctx.Input.Param(":path")
this.Ctx.Input.Param(":ext")
直接设置路由
在routers/router.go中设置,可以使用下面的基础函数直接设置路由:
beego.Get(router, beego.FilterFunc)
beego.Post(router, beego.FilterFunc)
beego.Put(router, beego.FilterFunc)
beego.Head(router, beego.FilterFunc)
beego.Options(router, beego.FilterFunc)
beego.Delete(router, beego.FilterFunc)
beego.Any(router, beego.FilterFunc)
例如:
//响应post /alice
beego.Post("/alice",func(ctx *context.Context){
	 ctx.Output.Body([]byte("bob"))
})

//响应到/foo的所有http请求
beego.Any("/foo",func(ctx *context.Context){
	 ctx.Output.Body([]byte("bar"))
})
以注册handler的方式设置路由
也可以使用beego.Handler(router, http.Handler)设置路由的handler:
beego.Handler("/rpc", s)
beego.Handler默认是完全匹配,不是前缀匹配。可以自定义http请求方法和处理函数的映射关系:
beego.Router("/api/list",&RestController{},"*:ListFood")
beego.Router("/api/create",&RestController{},"post:CreateFood")
beego.Router("/api/update",&RestController{},"put:UpdateFood")
beego.Router("/api/delete",&RestController{},"delete:DeleteFood")
自定义映射关系的格式为”请求方法:函数名”,请求方法有下面几种:
*: 包含以下所有的函数,优先级低于下面的方法
get: GET 请求
post: POST 请求
put: PUT 请求
delete: DELETE 请求
patch: PATCH 请求
options: OPTIONS 请求
head: HEAD 请求
自动注册路由
另外还有beego.AutoRouter($controllers.ObjectController{}),会自动通过反射为Object中的方法生成路由。
通过注解注册路由
在controller的方法上面加上router注释,router.go中通过beego.Include(&Controller)引入controller的时候会自动注册路由。
例如:
// CMS API
type CMSController struct {
	beego.Controller
}

func (c *CMSController) URLMapping() {
	c.Mapping("StaticBlock", c.StaticBlock)
	c.Mapping("AllBlock", c.AllBlock)
}

// @router /staticblock/:key [get]
func (this *CMSController) StaticBlock() {

}

// @router /all/:key [get]
func (this *CMSController) AllBlock() {

}
然后在router.go中:
beego.Include(&CMSController{})
beego会自动进行源码分析,如果是dev模式,会在routers/commentXXX.go文件。
使用namespace管理路由
namespace支持前套,并且可以对包含其中对路由进行前置过滤、条件判断。
namespace接口如下:
NewNamespace(prefix string, funcs …interface{})     初始化 namespace 对象
NSCond(cond namespaceCond)      支持满足条件才namespace
NSBefore(filiterList …FilterFunc)
NSAfter(filiterList …FilterFunc)
NSInclude(cList …ControllerInterface)
NSRouter(rootpath string, c ControllerInterface, mappingMethods …string)
NSGet(rootpath string, f FilterFunc)
NSPost(rootpath string, f FilterFunc)
NSDelete(rootpath string, f FilterFunc)
NSPut(rootpath string, f FilterFunc)
NSHead(rootpath string, f FilterFunc)
NSOptions(rootpath string, f FilterFunc)
NSPatch(rootpath string, f FilterFunc)
NSAny(rootpath string, f FilterFunc)
NSHandler(rootpath string, h http.Handler)
NSAutoRouter(c ControllerInterface)
NSAutoPrefix(prefix string, c ControllerInterface)
示例:
//初始化 namespace
ns :=
beego.NewNamespace("/v1",
    beego.NSCond(func(ctx *context.Context) bool {
        if ctx.Input.Domain() == "api.beego.me" {
            return true
        }
        return false
    }),
    beego.NSBefore(auth),
    beego.NSGet("/notallowed", func(ctx *context.Context) {
        ctx.Output.Body([]byte("notAllowed"))
    }),
    beego.NSRouter("/version", &AdminController{}, "get:ShowAPIVersion"),
    beego.NSRouter("/changepassword", &UserController{}),
    beego.NSNamespace("/shop",
        beego.NSBefore(sentry),
        beego.NSGet("/:id", func(ctx *context.Context) {
            ctx.Output.Body([]byte("notAllowed"))
        }),
    ),
    beego.NSNamespace("/cms",
        beego.NSInclude(
            &controllers.MainController{},
            &controllers.CMSController{},
            &controllers.BlockController{},
        ),
    ),
)
//注册 namespace
beego.AddNamespace(ns)
注册了以下的路由:
GET /v1/notallowed
GET /v1/version
GET /v1/changepassword
POST /v1/changepassword
GET /v1/shop/123
GET /v1/cms/ 对应 MainController、CMSController、BlockController 中得注解路由
需要特别注意的NSAfter()
NSAfter()注册的filter函数会在请求处理结束的时候被调用,但是要注意在bee 1.9.0中:
beego.NSAfter does not work after controller.ServeJSON
相关的issue:
注解路由无法进入NSBefore controller.ServeJSON should work will with beego.NSAfter
可以用github: study-beego里的的代码试验一下。
自动生成
从数据库一键生成代码
bee generate appcode [-tables=""] [-driver=mysql] [-conn="root:@tcp(127.0.0.1:3306)/test"] [-level=3]
    generate appcode based on an existing database
    -tables: a list of table names separated by ',', default is empty, indicating all tables
    -driver: [mysql | postgres | sqlite], the default is mysql
    -conn:   the connection string used by the driver.
             default for mysql:    root:@tcp(127.0.0.1:3306)/test
             default for postgres: postgres://postgres:[email protected]:5432/postgres
    -level:  [1 | 2 | 3], 1 = models; 2 = models,controllers; 3 = models,controllers,router
例如为数据库中所有的表生成models、controllers、router:
bee generate appcode -driver=mysql -conn="root:@tcp(127.0.0.1:3306)/kube-loadbalance" -level=3

$ ls models/
backend.go      listener.go     object.go       resource.go     user.go
cluster.go      loadbalancer.go pool.go         template.go

$ ls controllers/
backend.go      listener.go     object.go       resource.go     user.go
cluster.go      loadbalancer.go pool.go         template.go
routers/routers.go中也自动生成了路由:
func init() {
    ns := beego.NewNamespace("/v1",

        beego.NSNamespace("/backend",
            beego.NSInclude(
                &controllers.BackendController{},
            ),
        ),

        beego.NSNamespace("/cluster",
            beego.NSInclude(
                &controllers.ClusterController{},
            ),
        ),
...
生成controller
bee generate controller user
生成models
bee generate model user -fields="name:string,age:int"
生成view
bee generate view user
生成文档
自动创建swagge文件:
$ bee generate docs
启动后访问/swagger查看api:
func main() {
	if beego.BConfig.RunMode == "dev" {
		beego.BConfig.WebConfig.DirectoryIndex = true
		beego.BConfig.WebConfig.StaticDir["/swagger"] = "swagger"
	}
	beego.Run()
}
注意,如果是第一次运行,带上-downdoc=true:
bee run -downdoc=true
API自动文档语法
文档的语法参考beego: API自动化文档。
API自动化文档在routers/router.go和每个controller中设置。
全局设置必须在router.go中,且在文件的最顶部:
// @APIVersion 1.0.0
// @Title mobile API
// @Description mobile has every tool to get any job done, so codename for the new mobile APIs.
// @Contact [email protected]
// @TermsOfServiceUrl
// @License
// @LicenseUrl
package routers
controler必须是以namespace+include的方式注册到路由中,否则controller中的文档注释不生效。
// @Title Get Product list
// @Description Get Product list by some info
// @Success 200 {object} models.ZDTProduct.ProductList
// @Param   category_id     query   int false       "category id"
// @Param   brand_id    query   int false       "brand id"
// @Param   query   query   string  false       "query of search"
// @Param   segment query   string  false       "segment"
// @Param   sort    query   string  false       "sort option"
// @Param   dir     query   string  false       "direction asc or desc"
// @Param   offset  query   int     false       "offset"
// @Param   limit   query   int     false       "count limit"
// @Param   price           query   float       false       "price"
// @Param   special_price   query   bool        false       "whether this is special price"
// @Param   size            query   string      false       "size filter"
// @Param   color           query   string      false       "color filter"
// @Param   format          query   bool        false       "choose return format"
// @Failure 400 no enough input
// @Failure 500 get products common error
// @router /products [get]
func (c *CMSController) Product() {
...
}
Param后面的参数含义分别是:
参数名       输入方式               参数类型        是否必须   注释
        formData: post发送的数据    string           true
        query   : url参数           int              false
        path    : 路径参数          float
        body    : raw数据请求       PACKAGE.STRUCT
        header  : Header中的参数
使用bee命令启动应用:
bee run --gendoc=true -downdoc=true
现在就可以访问http://127.0.0.1:8080/swagger/查看api文档。
连接数据库
beego仿照Digango ORM和SQLAlchemy实现beego ORM,当前支持三个驱动:
MySQL:     github.com/go-sql-driver/mysql
PostgreSQL:github.com/lib/pq
Sqlite3:   github.com/mattn/go-sqlite3
beego生成的model文件中,会自动将model注册到orm,例如:
bee generate model user -fields="name:string,age:int"
生成的代码models/user.go中会在init()中注册:
func init() {
	orm.RegisterModel(new(User))
}
因此只需要手工书写orm初始化的代码,譬如在main.go中:
func init() {
	orm.RegisterDataBase("default", "mysql", "root:@tcp(127.0.0.1:3306)/mysql?charset=utf8", 30)
}
数据库迁移(migration)
数据库迁移功能可以数据库进行升级、回滚操作。
生成迁移文件,user是表名,fields是表结构:
bee generate migration user -driver=mysql -fields="name:string,age:int"
运行后,生成了文件:
|____database
| |____migrations
| | |____20171024_154037_user.go
执行下面的命令:
bee migrate -driver=mysql -conn="root:@tcp(127.0.0.1:3306)/study-beego"
study-beego中的表将会被创建或者更新,并在名为migrations的表中记录更新。

migrate的子命令
refresh、rollback执行失败,原因不明。
beego.Controller处理http请求
注意,在1.9.0中,需要在配置中设置copyrequestbody=true以后,c.Ctx.Input.RequestBody中才有数据。
func (c *UserController) Post() {
    var v models.User
    json.Unmarshal(c.Ctx.Input.RequestBody, &v)
    fmt.Println(v)
    if _, err := models.AddUser(&v); err == nil {
        c.Ctx.Output.SetStatus(201)
        c.Data["json"] = v
    } else {
        c.Data["json"] = err.Error()
    }
    c.ServeJSON()
}
解析请求参数
路径参数是在 controller 的注释中标注:
// Put ...
// @Title Put
// @Description update the Gateway
// @Param	id		path 	string	true		"The id you want to update"
// @Param	body		body 	types.Gateway	true		"body for Gateway content"
// @Success 200 {object} types.Gateway
// @Failure 403 :id is not int
// @router /:id [put]
func (c *GatewayController) Put() {

}
Beego 提供了下面这些获取参数的方法:
GetString(key string) string
GetStrings(key string) []string
GetInt(key string) (int64, error)
GetBool(key string) (bool, error)
GetFloat(key string) (float64, error)
测试用例
参考

推荐阅读
Copyright @2011-2019 All rights reserved. 转载请添加原文连接,合作请加微信lijiaocn或者发送邮件: [email protected],备注网站合作
友情链接: Some Online Tools Develop by Me 系统软件 程序语言 运营经验 水库文集 网络课程 微信网文